当一个规则匹配触发,就会给到一个或者多个的告警,这些告警具体会根据规则的配置来选择告警路子,便是告警行为,比如邮件、钉钉、tg、slack、企业微信等
ElastAlert 手册

Tips:Elastalert 0.2.0 之后利用 Python 3.6,不再利用 Python 2 版本
#安装EPEL和IUS软件源yum install epel-release -yyum install https://centos7.iuscommunity.org/ius-release.rpm -y#安装python3.6yum install python36u python36u-devel python36u-pip -y#ln -s /usr/bin/python3.6 /bin/python3#ln -s /usr/bin/pip3.6 /bin/pip32.2 安装 elastalert
pip3 install elastalert2.2.1 配置
cd /opt/soft/git clone https://github.com/Yelp/elastalert.git cd elastalertcp config.yaml.example config.yamlmkdir rules2.2.2 样例
https://github.com/Yelp/elastalert/tree/master/example_rules
2.2.3 config.yaml 配置文件#规则目录rules_folder: /opt/soft/elastalert/rules#多久从ES中查询一次run_every: seconds: 30#是查询窗口的大小,从每个查询运行的韶光向后延伸。对付个中use_count_query或use_terms_query设置为true的规则,此值将被忽略。buffer_time: minutes: 15#连接elasticsearch配置es_host: 127.0.0.1es_port: 9200es_username: elastices_password: xxxxxxxx#elastalert索引名称writeback_index: elastalert_statuswriteback_alias: elastalert_alerts#失落败重试限定alert_time_limit: days: 2
以下配置没利用,只做先容
#### 利用 TLS 连接诶 elastsearch#use_ssl: True#验证 tls 证书#verify_certs: True#带正文的GET要求是Elasticsearch的默认选项。如果由于某些缘故原由失落败了,你可以通过'GET','POST'或'source',详细可以查看以下(http://elasticsearch-py.readthedocs.io/en/master/connection.html?highlight=send_get_body_as#transport)#es_send_get_body_as: GET# 开启 ssl 认证证书#verify_certs: True#ca_certs: /path/to/cacert.pem#client_cert: /path/to/client_cert.pem#client_key: /path/to/client_key.key2.2.4 在 elasticsearch 中创建 elastalert 的日志索引
Tips : 如果索引已存在,则不会重新创建
elastalert-create-index --index elastalert
输出结果:
ProcessController: Elastic Version: 7.6.2Reading Elastic 6 index mappings:Reading index mapping 'es_mappings/6/silence.json'Reading index mapping 'es_mappings/6/elastalert_status.json'Reading index mapping 'es_mappings/6/elastalert.json'Reading index mapping 'es_mappings/6/past_elastalert.json'Reading index mapping 'es_mappings/6/elastalert_error.json'2.3 常用命令
# 测试规则文件elastalert-test-rule rule.yaml# 启动监控报警python3 -m elastalert.elastalert --verbose --rule /root/elastalert/example_rules/rule.yaml2.4 做事启动方法
Tips: 启动指定家目录的缘故原由紧张是有调用,可以少写路径,比如不须要指定 config.yml,rule 里面的 yml 文件可以少写路径指定==
2.4.1 service 启动管理# 创建elastalert做事文件vim /etc/systemd/system/elastalert.service
[Unit]Description=elastalertAfter=elasticsearch.service[Service]Type=simpleUser=rootGroup=rootRestart=on-failureWorkingDirectory=/opt/soft/elastalertExecStart=/usr/bin/python3 -m elastalert.elastalert --verbose --config /opt/soft/elastalert/config.yaml [Install]WantedBy=multi-user.target2.4.2 supervisor 启动管理
安装supervisor
yum install -y supervisorsystemctl enable supervisord
编写elastalert supervisord守护进程
vim /etc/supervisord.d/elastalert.ini
[program:elastalert]directory=/opt/soft/elastalertcommand=/usr/bin/python3 -m elastalert.elastalert --verboseautostart=truestartsecs=5autorestart=truestartretries=10redirect_stderr=truestdout_logfile_maxbytes=20MBstdout_logfile_backups=5stdout_logfile=/var/log/elastalert/elastalert.log
启动
systemctl enable supervisordsystemctl restart supervisordsystemctl start supervisordsystemctl stop supervisordsupervisorctl status三、告警测试3.1 es 测试索引3.1.1 创建并推送数据到 index
curl -X POST "http://elastic:passwd@127.0.0.1:9200/test-alert/test" -H 'Content-Type: application/json' -d '{"@timestamp": "'$(date --iso-8601=seconds)'", "field": "value"}'
输出:
{"_index":"test-alert","_type":"test","_id":"inH1I3cBMJwNYi416aLN","_version":1,"result":"created","_shards":{"total":2,"successful":1,"failed":0},"_seq_no":0,"_primary_term":1}
3.1.2 删除 indexcurl -X DELETE http://elastic:passwd@127.0.0.1:9200/test-alert
输出:
{"acknowledged":true}
3.1.3 查看有哪些索引curl 'http://elastic:passwd@127.0.0.1:9200/_cat/indices?v'
3.1.4查看索引内容:curl -X GET http://elastic:passwd@127.0.0.1:9200/test-alert/_search
输出结果:
{"took":2,"timed_out":false,"shards":{"total":1,"successful":1,"skipped":0,"failed":0},"hits":{"total":{"value":4,"relation":"eq"},"max_score":1.0,"hits":[{"index":"test-alert","type":"test","id":"inH1I3cBMJwNYi416aLN","score":1.0,"source":{"@timestamp": "2021-01-21T08:01:52+00:00", "field": "value"}},{"index":"test-alert","type":"test","id":"0ocXJHcBMJwNYi41y3rG","score":1.0,"source":{"@timestamp": "2021-01-21T08:37:55+0000", "field": "value"}},{"index":"test-alert","type":"test","id":"aZAiJHcBMJwNYi41QTqW","score":1.0,"source":{"@timestamp": "2021-01-21T08:49:20+0000", "field": "value"}},{"index":"test-alert","type":"test","id":"1ZMmJHcBMJwNYi41h4z8","score":1.0,"source":{"@timestamp": "2021-01-21T08:54:00+0000", "field": "value"}}]}}
vim /opt/soft/elastalert/rules/emailtt.yml
name: test-alerttype: any# es 的监控索引index: test-ale# 创造 1 次就告警num_events: 1#1 分钟检讨1次,和上面一起合营便是 1 分钟内触发 1 次规则就告警timeframe: minutes: 1 #告警规则,查询索引内 field 字段的值 value,可以用正则进行匹配filter:- query: query_string: query: "field: value" ## smtp 邮件 server 配置smtp_host: smtp.zoho.comsmtp_port: 465smtp_ssl: truefrom_addr: "test@qq.com"### 发送邮件的账号密码smtp_auth_file: /opt/soft/elastalert/elastalert/smtp_auth_file.yml#告警办法alert:- "email"#设置只须要的告警字段include: ["_index","uri","remote_addr","http_x_forwarded_for","status"]#邮件标题alert_subject: "test-alert 正式环境 告警 {}"#告警邮件吸收人email:- "test@qq.com"- "test1@qq.comk"3.2.2 发送邮件的账号密码
vi /opt/soft/elastalert/elastalert/smtp_auth_file.yml
# 发件箱的qq邮箱地址,也便是用户名user: test@qq.com# 不是qq邮箱的登录密码,是授权码password: passwd3.2.3 启动告警规则并发送测试数据
cd /opt/soft/elastalertpython3 -m elastalert.elastalert --verbose --rule /opt/soft/elastalert/rules/emailtt.yml3.3 钉钉告警3.3.1 下载插件
cd /opt/soft/elastalertgit clone https://github.com/xuyaoqiang/elastalert-dingtalk-plugincp elastalert-dingtalk-plugin/elastalert_modules/dingtalk_alert.py elastalert/3.3.2 安装依赖
#查看依赖文件elastalert-dingtalk-plugin/requirements.txt,在比拟 pip list 之后,我创造只须要安装以下内容即可pip3 install pyOpenSSL==16.2.0pip3 install requests==2.18.1pip3 install setuptools>=11.33.3.3 创建测试告警规则
vim /opt/soft/elastalert/rules/dingtt.yml
name: Example frequency ruletype: anyindex: test-alertnum_events: 1timeframe: minutes: 1filter:- query: query_string: query: "field: value"#告警办法alert:- "elastalert.dingtalk_alert.DingTalkAlerter"#钉钉接口dingtalk_webhook: "https://oapi.dingtalk.com/robot/send?access_token=钉钉机器人 api token"dingtalk_msgtype: "text"3.3.4 启动告警规则并发送测试数据
cd /opt/soft/elastalertpython3 -m elastalert.elastalert --verbose --rule /opt/soft/elastalert/rules/dingtt.yml3.3.5 钉钉机器人配置
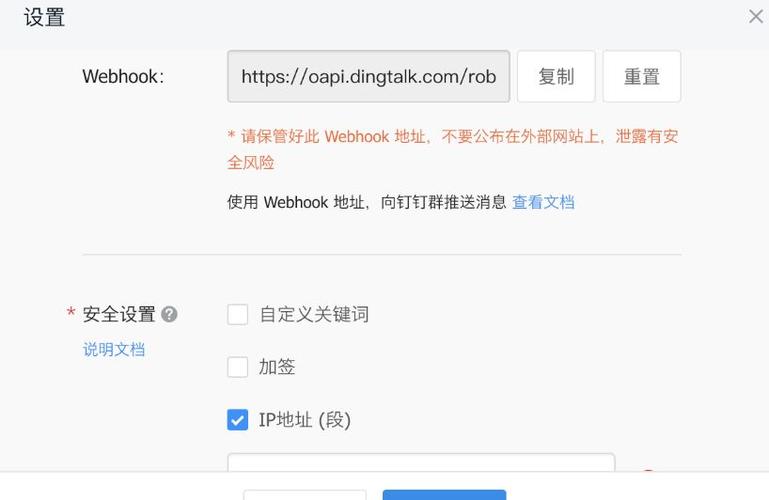
详细可以查看钉钉机器人开拓文档
最大略可以利用加 ip 办法加关键字,便是发送到钉钉的信息里面有某个关键字3.3.6 测试结果告警内容如下所示3.4 微信告警3.4.1 参考https://github.com/anjia0532/elastalert-wechat-plugin
https://anjia0532.github.io/2017/02/16/elastalert-wechat-plugin/
https://github.com/anjia0532/elastalert-docker
3.5 告警格式优化# 把稳高下字段对应alert_text: | kibana_url: "https://hostname:5601/app/kibana" alarm_reason: "1分钟内login.php至少被访问10次" alarm_name: {} request_uri: {} request_ip: {} response_status: {}alert_text_args: - name - request - clientip - responsealert_text_type: alert_text_only四、kibana 添加 elastalert 插件4.1 elastalert-kibana-plugin插件
kibana中elastalert插件,可以实现在kibana界面上编辑elastalert的告警规则配置。
kibana 的 elastalert 插件须要利用新的 bitsensor/elastalert api 做事
4.1.1 演示效果4.2 安装 elastalert-kibana-plugin官网主推:bitsensor/elastalert-kibana-plugin
但是楼上那个很多小版本都没有,以上没有的话推举利用以下版本:
nsano-rururu/elastalert-kibana-plugin
目前版本支持:
Kibana 6.8.1~6.8.12、7.5.1~7.8.1Kibana 7.9.0~7.9.34.2.1 安装命令/usr/share/kibana/bin/kibana-plugin install https://github.com/nsano-rururu/elastalert-kibana-plugin/releases/download/1.2.0/elastalert-kibana-plugin-1.2.0-7.6.2.zip --allow-root
4.2.2 配置默认情形下,插件将连接到 localhost:3030,也便是 kibana 和 elastalert 在同一台做事器上面,那么就不须要添加以下配置。如果您的ElastAlert做事器在其他主机或端口上运行,请在config / kibana.yml文件中添加变动以下选项:
elastalert-kibana-plugin.serverHost: 192.168.1.1elastalert-kibana-plugin.serverPort: 90004.3 安装 elastalert_docker
查看 nsano 供应的 elastalert api 做事支持列表
我利用的是 praecoapp/elastalert-server 供应的 docker 镜像对应 elastalert 0.2.4 版本
docker-compose sample 示例参考
4.3.1 安装命令cd /opt/soft/git clone https://github.com/bitsensor/elastalert.git elastalert_dockercd elastalert_dockermkdir rules 4.3.2 变动配置,api server 端用的配置是config.json
vi config/config.json
由于我的 kibana 和 elastalert docker 是同一台机,以是我紧张修正 es 的配置就可以
{ "appName": "elastalert-server", "port": 3030, "wsport": 3333, "elastalertPath": "/opt/elastalert", "verbose": false, "es_debug": false, "debug": false, "rulesPath": { "relative": true, "path": "/rules" }, "templatesPath": { "relative": true, "path": "/rule_templates" }, "es_host": "192.168.3.30", "es_port": 9200, "writeback_index": "elastalert_status"}4.3.3 变动 elastalert 配置
vi ./config/elastalert.yaml
es_host: 192.168.3.30es_port: 9200rules_folder: rulesrun_every: seconds: 5buffer_time: minutes: 1es_username: elastices_password: passwdwriteback_index: elastalert_statusalert_time_limit: days: 24.3.4 docker-compose.yml 配置文件
vi docker-compose.yml
version: '3'services: elastalert: image: praecoapp/elastalert-server:20210104 container_name: elastalert hostname: elastalert restart: always network_mode: "host" ports: - "3030:3030" - "3333:3333" volumes: - ./config/elastalert.yaml:/opt/elastalert/config.yaml - ./config/elastalert-test.yaml:/opt/elastalert/config-test.yaml - ./config/config.json:/opt/elastalert-server/config/config.json - ./rules:/opt/elastalert/rules - ./rule_templates:/opt/elastalert/rule_templates #- ./elastalert:/opt/elastalert/elastalert,#这一句先注释掉,下面有个操作4.3.5 启动
docker-compose up -d##然后把 docker 镜像里面的 elastalert 复制出来docker cp elastalert:/opt/elastalert/elastalert .##再把docker-compose.yml 里面的 volumes 的注释项去掉重新启动docker-compose up -d4.3.6 配套钉钉插件和规则测试
cd /opt/soft/elastalert_dockergit clone https://github.com/xuyaoqiang/elastalert-dingtalk-plugincp elastalert-dingtalk-plugin/elastalert_modules/dingtalk_alert.py elastalert/##安装依赖docker exec -it elastalert pip install pyOpenSSL==16.2.0docker exec -it elastalert pip install requests==2.18.1docker exec -it elastalert pip install setuptools>=11.3#创建规则touch rules/dingtt.yml#授权,否则页面无法编辑,详细可以看下面的报错示例chown centos.centos rules/dingtt.yml#重新启动 elastalert 容器docker restart elastalert##查看日志docker logs -f --tail=20 elastalert4.4 涌现的报错:
01:50:07.285Z ERROR elastalert-server: Routes: Request for '/rules/:id' failed with error: [Error: EACCES: permission denied, open '/opt/elastalert/rules/dingtt.yaml'] { errno: -13, code: 'EACCES', syscall: 'open', path: '/opt/elastalert/rules/dingtt.yaml' }
办理办法:
直接 chmod 777 -R /opt/soft/elastalert_docker/rules/直接 chown centos.centos /opt/soft/elastalert_docker/rules/五、告警规则详解ElastAlert 规则先容
5.1 告警类型ElastAlert包含几种具有常见监视范例的规则类型:any: 匹配任何与给定过滤器匹配的事宜,这个是查到了什么便直接报警,属于自定义选项;frequency: 匹配Y韶光内至少有X个事宜的地方spike: 当事宜发生率增加或减少时匹配,API 流量陡然上升并立时规复的时候;flatline: 在Y韶光内少于X个事宜时进行匹配,内存或者CPU利用率低落的时候;blacklist并whitelist输入: 当某个字段与黑名单/白名单匹配时匹配,昨天的那个疑似爬虫的 IP 地址又涌现了;change: 当某个字段在一段韶光内具有两个不同的值时进行匹配,运用的状态溘然从 UP 转为 DOWN;new_term: 当字段中涌现从未见过的术语时进行匹配,某个列举类型字段,溘然涌现了未定义的类型;cardinality:当字段的唯一值数量大于或小于阈值时匹配,线上的 API 做事器溘然挂了一台,它是根据唯一值的数量来剖断的;5.2 报警抑制:减少重复报警
# 用来区分报警,跟 realert 合营利用,在这里意味着,# 5 分钟内如果有重复报警,那么当 name 不同时,会当做不同的报警处理,可以是数组query_key: - name# 5 分钟内相同的报警不会重复发送realert: minutes: 5# 指数级扩大 realert 韶光,中间如果有报警,# 则按照 5 -> 10 -> 20 -> 40 -> 60 不断增大报警韶光到制订的最大韶光,# 如果之后报警减少,则会逐步恢复原始 realert 韶光exponential_realert: hours: 15.3 报警聚合:相同报警,聚合为一条
# 根据报警的内,将相同的报警安装 name 来聚合aggregation_key: name# 聚合报警的内容,只展示 name 与 messagesummary_table_fields: - name - message5.4 报警格式化:突出主要信息
在这里,你可以自定义 alert 的内容,它的内部利用 Python 的 format 来实现的。
alert_subject: "Error {} @{}"alert_subject_args: - name - "@timestamp"alert_text_type: alert_text_onlyalert_text: | ### Error frequency exceeds > Name: {} > Message: {} > Host: {} ({})alert_text_args: - name - message - hostname - host六、告警吸收办法
EmailSlack企业微信钉钉alerta:https://github.com/alerta/alerta,告警吸收平台JIRAOpsGenieCommandsHipChatMS TeamsTelegramAWS SNSVictorOpsPagerDutyExotelTwilioGitter七、告警需求整理
整理下履行ELK最最少要实现的需求:
查询条件(精确匹配):一级域名、二级域名、客户真实IP、HTTP状态码、HTTP方法、request_time、response_time、代理IP、body_bytes_sent查询条件(模糊匹配):url(如查找SQL注入关键字)、refere(流量来源)、agent(如查找搜索引擎)近期(1周、1个月)内整体要求量走势情形;如果创造总体走势非常,要很方便找到那个域名走势非常;过去一个周期内(1天、1周、1月)所有要求构成,按不同域名出饼图;实时监控爬虫IP过高的频率访问(如单个IP1分钟要求超过100次报警);实时监控500状态要求情形(如单个域名1分钟涌现30个500就报警);参考https://github.com/Yelp/elastalert
https://github.com/bitsensor/elastalert
https://github.com/bitsensor/elastalert-kibana-plugin
https://github.com/xuyaoqiang/elastalert-dingtalk-plugin
https://github.com/anjia0532/elastalert-wechat-plugin
https://segmentfault.com/a/1190000017553282
https://blog.csdn.net/wenwenxiong/article/details/106048313
https://www.cnblogs.com/liuxinyustu/articles/14228934.html
本文作者:欲戴王冠,必承其重...易波叶平本文链接:https://www.cnblogs.com/UncleZhao/p/14314270.html