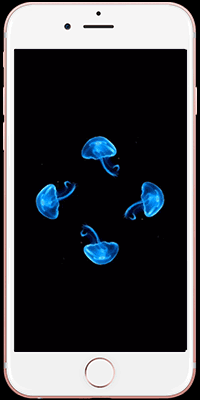
Live Photos是iOS中的一种分外的照片类型,它是由一组静态照片和一个短视频组成的。用户可以通过点击屏幕或按住照片来查看这个短视频,并让照片呈现动态的效果。在这里,我们将利用Live Photos的这个特性来实现动态壁纸的效果。
首先,我们须要为我们的动态壁纸准备一组静态照片和一个短视频。我们可以利用iPhone的相机运用拍摄一组照片,并利用iOS的相册运用来将这些照片组合成一个Live Photo。在相册运用中,我们可以找到Live Photo并将其导出到我们的运用中。

在运用中,我们可以利用UIImageView来显示Live Photo。首先,我们须要将Live Photo文件加载到内存中:
phpCopy codelet livePhotoURL = // Live Photo文件确当地URLlet livePhoto = PHLivePhotoView(frame: view.bounds)PHLivePhoto.request(withResourceFileURLs: [livePhotoURL], placeholderImage: nil, targetSize: view.bounds.size, contentMode: .aspectFill, resultHandler: { (livePhoto, info) in self.livePhotoView.livePhoto = livePhoto})
在将Live Photo加载到内存中后,我们可以将其设置为UIImageView的image属性来显示动态壁纸:
phpCopy codelet livePhotoURL = // Live Photo文件确当地URLlet livePhoto = PHLivePhotoView(frame: view.bounds)PHLivePhoto.request(withResourceFileURLs: [livePhotoURL], placeholderImage: nil, targetSize: view.bounds.size, contentMode: .aspectFill, resultHandler: { (livePhoto, info) in self.livePhotoView.livePhoto = livePhoto self.view.addSubview(self.livePhotoView) self.livePhotoView.startPlayback(with: .full)})
我们还可以在动态壁纸的效果上添加一些自定义的动画和效果。例如,我们可以在用户单击屏幕时添加一些粒子效果:
swiftCopy codeoverride func touchesBegan(_ touches: Set<UITouch>, with event: UIEvent?) { let emitter = CAEmitterLayer() emitter.emitterPosition = touches.first!.location(in: view) emitter.emitterShape = .point emitter.emitterSize = CGSize(width: 20, height: 20) emitter.emitterCells = [CAEmitterCell()] view.layer.addSublayer(emitter)}
这里的代码将在用户单击屏幕时在屏幕上添加一个粒子效果。