validator流程
这实在是一个措辞无关的场景,须要进行字段校验的情形有很多,Web系统的Form或JSON提交只是一个范例的例子。我们用Go来写一个类似上图的校验示例。然后研究怎么一步步对其进行改进。
重构要求校验函数假设我们的数据已经通过某个开源绑定库绑定到了详细的构造体上。

type RegisterReq struct { Username string `json:"username"` PasswordNew string `json:"password_new"` PasswordRepeat string `json:"password_repeat"` Email string `json:"email"`}func register(req RegisterReq) error{ if len(req.Username) > 0 { if len(req.PasswordNew) > 0 && len(req.PasswordRepeat) > 0 { if req.PasswordNew == req.PasswordRepeat { if emailFormatValid(req.Email) { createUser() return nil } else { return errors.New("invalid email") } } else { return errors.New("password and reinput must be the same") } } else { return errors.New("password and password reinput must be longer than 0") } } else { return errors.New("length of username cannot be 0") }}
我们用Go里成功写出了颠簸拳开路的箭头型代码。。这种代码该怎么进行优化呢?
很大略,在《重构》一书中已经给出了方案:Guard Clauses。
func register(req RegisterReq) error{ if len(req.Username) == 0 { return errors.New("length of username cannot be 0") } if len(req.PasswordNew) == 0 || len(req.PasswordRepeat) == 0 { return errors.New("password and password reinput must be longer than 0") } if req.PasswordNew != req.PasswordRepeat { return errors.New("password and reinput must be the same") } if emailFormatValid(req.Email) { return errors.New("invalid email") } createUser() return nil}
代码更清爽,看起来也不那么别扭了。这是比较通用的重构理念。虽然利用了重构方法使我们的校验过程代码看起来优雅了,但我们还是得为每一个http要求都去写这么一套差不多的validate()函数,有没有更好的办法来帮助我们解除这项体力劳动?答案便是validator。
用validator解放体力劳动从设计的角度讲,我们一定会为每个要求都声明一个构造体。前文中提到的校验场景我们都可以通过validator完成事情。还以前文中的构造体为例。为了都雅起见,我们先把json tag省略掉。
这里我们引入一个新的validator库:
https://github.com/go-playground/validator
import "gopkg.in/go-playground/validator.v9"type RegisterReq struct { // 字符串的 gt=0 表示长度必须 > 0,gt = greater than Username string `validate:"gt=0"` // 同上 PasswordNew string `validate:"gt=0"` // eqfield 跨字段相等校验 PasswordRepeat string `validate:"eqfield=PasswordNew"` // 合法 email 格式校验 Email string `validate:"email"`}validate := validator.New()func validate(req RegisterReq) error { err := validate.Struct(req) if err != nil { doSomething() return err } ...}
这样就不须要在每个要求进入业务逻辑之前都写重复的validate()函数了。本例中只列出了这个校验器非常大略的几个功能。
我们试着跑一下这个程序,输入参数设置为:
//...var req = RegisterReq { Username : "Xargin", PasswordNew : "ohno", PasswordRepeat : "ohn", Email : "alex@abc.com",}err := validate(req)fmt.Println(err)// Key: 'RegisterReq.PasswordRepeat' Error:Field validation for// 'PasswordRepeat' failed on the 'eqfield' tag
如果以为这个validator供应的缺点信息不足人性化,例如要把缺点信息返回给用户,那就不应该直接显示英文了。可以针对每种tag进行缺点信息定制,读者可以自行探索。
事理从构造上来看,每一个构造体都可以算作是一棵树。如果我们有如下定义的构造体:
type Nested struct { Email string `validate:"email"`}type T struct { Age int `validate:"eq=10"` Nested Nested}
把这个构造体画成一棵树
validator 树
从字段校验的需求来讲,无论我们采取深度优先搜索还是广度优先搜索来对这棵构造体树来进行遍历,都是可以的。
我们来写一个递归的深度优先搜索办法的遍历示例:
package mainimport ( "fmt" "reflect" "regexp" "strconv" "strings")type Nested struct { Email string `validate:"email"`}type T struct { Age int `validate:"eq=10"` Nested Nested}func validateEmail(input string) bool { if pass, _ := regexp.MatchString( `^([\w\.\_]{2,10})@(\w{1,}).([a-z]{2,4})$`, input, ); pass { return true } return false}func validate(v interface{}) (bool, string) { validateResult := true errmsg := "success" vt := reflect.TypeOf(v) vv := reflect.ValueOf(v) for i := 0; i < vv.NumField(); i++ { fieldVal := vv.Field(i) tagContent := vt.Field(i).Tag.Get("validate") k := fieldVal.Kind() switch k { case reflect.Int: val := fieldVal.Int() tagValStr := strings.Split(tagContent, "=") tagVal, _ := strconv.ParseInt(tagValStr[1], 10, 64) if val != tagVal { errmsg = "validate int failed, tag is: "+ strconv.FormatInt( tagVal, 10, ) validateResult = false } case reflect.String: val := fieldVal.String() tagValStr := tagContent switch tagValStr { case "email": nestedResult := validateEmail(val) if nestedResult == false { errmsg = "validate mail failed, field val is: "+ val validateResult = false } } case reflect.Struct: // 如果有内嵌的 struct,那么深度优先遍历 // 便是一个递归过程 valInter := fieldVal.Interface() nestedResult, msg := validate(valInter) if nestedResult == false { validateResult = false errmsg = msg } } } return validateResult, errmsg}func main() { var a = T{Age: 10, Nested: Nested{Email: "abc@abc.com"}} validateResult, errmsg := validate(a) fmt.Println(validateResult, errmsg)}
这里我们大略地对eq=x和email这两个tag进行了支持,读者可以对这个程序进行大略的修正以查看详细的validate效果。为了演示精简掉了缺点处理和繁芜情形的处理,例如reflect.Int8/16/32/64,reflect.Ptr等类型的处理,如果给生产环境编写校验库的话,请务必做好功能的完善和容错。
在开源校验组件在功能上要远比我们这里的例子繁芜得多。但事理很大略,便是用反射对构造体进行树形遍历。有心的读者这时候可能会产生一个问题,我们对构造体进行校验时大量利用了反射,而Go的反射在性能上不太出众,有时乃至会影响到我们程序的性能。这样的考虑确实有一些道理,但须要对构造体进行大量校验的场景每每涌如今Web做事,这里并不一定是程序的性能瓶颈所在,实际的效果还是要从pprof中做更精确的判断。
pprofpprof是GoLang程序性能剖析工具,prof是profile(画像)的缩写,用pprof我们可以剖析下面9种数据
真正剖析时常用4种
CPU Profiling:CPU 剖析,按照一定的频率采集所监听的运用程序 CPU(含寄存器)的利用情形,可确定运用程序在主动花费 CPU 周期时花费韶光的位置Memory Profiling:内存剖析,在运用程序进行堆分配时记录堆栈跟踪,用于监视当前和历史内存利用情形,以及检讨内存泄露Block Profiling:壅塞剖析,记录 goroutine 壅塞等待同步(包括定时器通道)的位置Mutex Profiling:互斥锁剖析,报告互斥锁的竞争情形做性能剖析,第一步须要先获取数据,然后对数据进行剖析。以是下面展示一下如何进行数据获取。
数据获取数据获取的方法和运用的类型干系:
工具型运用:实行完任务就退出做事型运用:一贯运行,如web做事等利用默认 ServerMux自定义 ServerMux开源web框架,如gin等grpc类做事工具形运用工具形运用紧张利用 runtime/pprof 库,将画像数据写入文件中。
package mainimport ("fmt""os""runtime/pprof")func main() {//CPU Profilef, err := os.Create("./cpuprofile")if err != nil {fmt.Println(err)return}defer f.Close()pprof.StartCPUProfile(f)defer pprof.StopCPUProfile()//Memory Profilefm, err := os.Create("./memoryprofile")if err != nil {fmt.Println(err)return}defer fm.Close()pprof.WriteHeapProfile(fm)for i := 0; i < 100; i++ {fmt.Println("程序员麻辣烫")}}
实行完后,会创造cpuprofile、memoryprofile文件,里面包含cpu、内存的画像。 runtime/pprof 直接支持这两种画像。
做事型运用利用默认ServerMux这种是指利用了默认的 http.DefaultServeMux,常日是代码直策应用 http.ListenAndServe("0.0.0.0:8000", nil),第二个参数赋值为nil的情形。对付这种只须要在代码中添加一行,匿名引用net/http/pprof。
package mainimport ( "fmt" "net/http" _ "net/http/pprof" "strings")func sayhelloName(w http.ResponseWriter, r http.Request) { r.ParseForm() //解析参数,默认是不会解析的 fmt.Println(r.Form) //这些信息是输出到做事器真个打印信息 fmt.Println("path", r.URL.Path) fmt.Println("scheme", r.URL.Scheme) fmt.Println(r.Form["url_long"]) for k, v := range r.Form { fmt.Println("key:", k) fmt.Println("val:", strings.Join(v, "")) } fmt.Fprintf(w, "Hello 程序员麻辣烫!")}func main() { http.HandleFunc("/", sayhelloName) //设置访问的路由 err := http.ListenAndServe(":9090", nil) //设置监听的端口 if err != nil { fmt.Printf("ListenAndServe: %s", err) }}
实行 http://localhost:9090/?url_long=111&url_long=222 可看到返回内容 “Hello 程序员麻辣烫!”。
实行 http://localhost:9090/debug/pprof/ 可看到画像信息,如图一所示。
利用自定义的ServerMux这里阐明一下ServerMux,它是HTTP包中的一个构造体,里面存储了指定路径和该路径对应的处理函数
type ServeMux struct { mu sync.RWMutex m map[string]muxEntry es []muxEntry // slice of entries sorted from longest to shortest. hosts bool // whether any patterns contain hostnames}
HTTP包中Server的hander默认便是DefaultServeMux
type Server struct { Addr string // TCP address to listen on, ":http" if empty Handler Handler // handler to invoke, http.DefaultServeMux if nil}
http.ListenAndServe函数可以通报handler,如果handler不为nil,则解释研发自定义了 ServerMux,否则用的是默认DefaultServeMux
// ListenAndServe always returns a non-nil error.func ListenAndServe(addr string, handler Handler) error { server := &Server{Addr: addr, Handler: handler} return server.ListenAndServe()}
ListenAndServe终极会调用到ServeHTTP函数,根据路径找到对应的实行函数,全体流程结束
func (sh serverHandler) ServeHTTP(rw ResponseWriter, req Request) { handler := sh.srv.Handler if handler == nil { handler = DefaultServeMux } if req.RequestURI == "" && req.Method == "OPTIONS" { handler = globalOptionsHandler{} } handler.ServeHTTP(rw, req)}
net/http/pprof包中,有init函数
func init() { http.HandleFunc("/debug/pprof/", Index) http.HandleFunc("/debug/pprof/cmdline", Cmdline) http.HandleFunc("/debug/pprof/profile", Profile) http.HandleFunc("/debug/pprof/symbol", Symbol) http.HandleFunc("/debug/pprof/trace", Trace)}
以是如果利用默认ServerMux,则不须要注册,但是如果利用自定义的ServerMux,则须要增加注册后,才能获取到pprof。
r.HandleFunc("/debug/pprof/", pprof.Index)r.HandleFunc("/debug/pprof/cmdline", pprof.Cmdline)r.HandleFunc("/debug/pprof/profile", pprof.Profile)r.HandleFunc("/debug/pprof/symbol", pprof.Symbol)r.HandleFunc("/debug/pprof/trace", pprof.Trace)
这里就不编写代码了,由于自定义一个ServerMux虽然难度不大,但是还是有些耗时的。大家知道对这种情形如何添加pprof即可。
操作完成后,开始实行 http://localhost:9090/debug/pprof/ 可看到画像信息,如图一所示。
开源web框架开源web框架很多,由于常用gin,此处就讲述一下如何在gin框架中利用pprof。
在gin中利用pprof比较大略:
直接引入Gin项目组供应的gin-contrib/pprof包调用pprof.Register(r)package mainimport ( "github.com/gin-contrib/pprof" "github.com/gin-gonic/gin" "net/http")func Ping(c gin.Context) { c.String(http.StatusOK, "ok")}func main() { r := gin.Default() pprof.Register(r) r.GET("/ping", Ping) // Listen and Server in 0.0.0.0:8080 r.Run(":8082")}
实行 http://localhost:8082/ping 可看到返回结果 “OK”
实行 http://localhost:8082/debug/pprof/ 可看到画像信息,如图一所示
之以是调用pprof.Register(r)后pprof干系路由可访问,是由于Register替我们做了路径注册的事情
// Register the standard HandlerFuncs from the net/http/pprof package with// the provided gin.Engine. prefixOptions is a optional. If not prefixOptions,// the default path prefix is used, otherwise first prefixOptions will be path prefix.func Register(r gin.Engine, prefixOptions ...string) { RouteRegister(&(r.RouterGroup), prefixOptions...)}// RouteRegister the standard HandlerFuncs from the net/http/pprof package with// the provided gin.GrouterGroup. prefixOptions is a optional. If not prefixOptions,// the default path prefix is used, otherwise first prefixOptions will be path prefix.func RouteRegister(rg gin.RouterGroup, prefixOptions ...string) { prefix := getPrefix(prefixOptions...) prefixRouter := rg.Group(prefix) { prefixRouter.GET("/", pprofHandler(pprof.Index)) prefixRouter.GET("/cmdline", pprofHandler(pprof.Cmdline)) prefixRouter.GET("/profile", pprofHandler(pprof.Profile)) prefixRouter.POST("/symbol", pprofHandler(pprof.Symbol)) prefixRouter.GET("/symbol", pprofHandler(pprof.Symbol)) prefixRouter.GET("/trace", pprofHandler(pprof.Trace)) prefixRouter.GET("/allocs", pprofHandler(pprof.Handler("allocs").ServeHTTP)) prefixRouter.GET("/block", pprofHandler(pprof.Handler("block").ServeHTTP)) prefixRouter.GET("/goroutine", pprofHandler(pprof.Handler("goroutine").ServeHTTP)) prefixRouter.GET("/heap", pprofHandler(pprof.Handler("heap").ServeHTTP)) prefixRouter.GET("/mutex", pprofHandler(pprof.Handler("mutex").ServeHTTP)) prefixRouter.GET("/threadcreate", pprofHandler(pprof.Handler("threadcreate").ServeHTTP)) }}
该项目地址为:https://github.com/shidawuhen/asap
grpc类做事上面的几种做事型运用都能通过链接直接访问,如果是grpc这种类型的做事,如何利用pprof呢?
pprof做CPU剖析事理是按照一定的频率采集程序CPU(包括寄存器)的利用情形,以是我们可以
在gRPC做事启动时,异步启动一个监听其他端口的HTTP做事,通过这个HTTP做事间接获取gRPC做事的剖析数据由于gin利用默认的ServerMux(做事复用器),以是只要匿名导入net/http/pprof包,这个HTTP的复用器默认就会注册pprof干系的路由package mainimport ( "context" "log" "net" "net/http" "google.golang.org/grpc" pb "grpcservice/helloworld" _ "net/http/pprof")const ( port = ":50051" portpprof = ":50052")// server is used to implement helloworld.GreeterServer.type server struct { pb.UnimplementedGreeterServer}// SayHello implements helloworld.GreeterServerfunc (s server) SayHello(ctx context.Context, in pb.HelloRequest) (pb.HelloReply, error) { log.Printf("Received: %v", in.GetName()) return &pb.HelloReply{Message: "Hello " + in.GetName()}, nil}func main() { //pprof go func() { http.ListenAndServe(portpprof, nil) }() lis, err := net.Listen("tcp", port) if err != nil { log.Fatalf("failed to listen: %v", err) } s := grpc.NewServer() pb.RegisterGreeterServer(s, &server{}) if err := s.Serve(lis); err != nil { log.Fatalf("failed to serve: %v", err) }}
github地址为:https://github.com/shidawuhen/grpcservice (以前学习时的demo竟然用到新文章上,愉快)
实行 http://localhost:50052/debug/pprof/ 可看到画像信息,如图一所示
PS:通过剖析上面几种类型,可以看出对付做事型运用,核心在于将pprof的路由注册到做事中,并能供应访问。
数据剖析虽然我们天生了数据,这些数据可以存储到文件里、也可以展示在浏览器中。
但是直接访问这些性能剖析数据,我们是剖析不过来什么的。Go在1.11版本后在它自带的工具集go tool里内置了pprof工具来剖析由pprof库天生的数据文件。
利用go tool pprof剖析数据,紧张有两种写法:
通过路径,如go tool pprof http://localhost:8082/debug/pprof/profile (进入命令行交互模式)通过下载的文件,如go tool pprof cpuprofile (进入命令行交互模式)或者 go tool pprof -http=:9091 cpuprofile(进入web页面)进入命令行交互模式后,可以利用help查看所有子命令,利用help <cmd|option>查看子命令利用方法。
(pprof) helpCommands:callgrind Outputs a graph in callgrind formatcomments Output all profile comments(pprof) help topOutputs top entries in text form Usage: top [n] [focus_regex] [-ignore_regex] [-cum] >f
详细选择哪种根据自己须要利用,本文都是用通过路径的方案进行剖析,利用https://github.com/shidawuhen/asap中的代码。
CPU Profiling先来看profile,访问/debug/pprof/profile这个链接会自动进行 CPU profiling,持续 30s,并天生一个文件供下载,可以通过带参数?=seconds=60进行60秒的数据采集。
为了仿照要求,利用ab进行压测,ab -k -c 1 -t 180 -n 100000000 http://localhost:8082/limit/countreject
实行go tool pprof http://localhost:8082/debug/pprof/profile后,默认须要等30s才会显示交互
列出最耗时的地方(pprof) top 20Showing nodes accounting for 30.06s, 99.01% of 30.36s totalDropped 52 nodes (cum <= 0.15s)Showing top 20 nodes out of 78 flat flat% sum% cum cum% 8.74s 28.79% 28.79% 8.76s 28.85% syscall.syscall 5.99s 19.73% 48.52% 5.99s 19.73% runtime.pthread_cond_signal 4.46s 14.69% 63.21% 4.46s 14.69% runtime.pthread_cond_wait 3.25s 10.70% 73.91% 3.25s 10.70% runtime.kevent 2.25s 7.41% 81.32% 5.50s 18.12% runtime.netpoll 2s 6.59% 87.91% 2s 6.59% runtime.nanotime 1.44s 4.74% 92.65% 1.44s 4.74% runtime.usleep 0.68s 2.24% 94.89% 0.68s 2.24% runtime.pthread_cond_timedwait_relative_np 0.55s 1.81% 96.71% 1.23s 4.05% runtime.notetsleep 0.50s 1.65% 98.35% 0.67s 2.21% net/http.(connReader).backgroundRead 0.11s 0.36% 98.72% 11.24s 37.02% runtime.findrunnable 0.04s 0.13% 98.85% 4.52s 14.89% runtime.stopm 0.03s 0.099% 98.95% 0.23s 0.76% runtime.runqgrab 0.02s 0.066% 99.01% 5.48s 18.05% internal/poll.(FD).Write 0 0% 99.01% 2.84s 9.35% asap/aredis.(RedisManager).Do 0 0% 99.01% 2.84s 9.35% asap/aredis.(RedisManager).Incr 0 0% 99.01% 2.84s 9.35% asap/aredis.(RedisManager).Incr.func1 0 0% 99.01% 2.84s 9.35% asap/aredis.(RedisManager).redialDo 0 0% 99.01% 3.10s 10.21% asap/controller/limit.CountReject 0 0% 99.01% 1.50s 4.94% bufio.(Reader).ReadLine
每一行表示一个函数的信息。
flat:函数在 CPU 上运行的韶光
flat%:函数在CPU上运行韶光的百分比
sum%:是从上到下进行所有函数累加利用 CPU 的比例,如第二行sum=48.52=28.79+19.73
cum:这个函数以及子函数运行所占用的韶光,该当大于即是flat
cum%:这个函数以及子函数运行所占用的比例,该当大于即是flat%
末了一列:函数的名字
如果运用程序有性能问题,上面这些信息该当能见告我们韶光都花费在哪些函数的实行上。通过这些信息可以创造,redis操作所花费的韶光微乎其微。
天生函数调用图在交互模式下输入 web,就能自动天生一个 svg 文件,并跳转到浏览器打开,天生了一个函数调用图,不过须要安装graphviz后才能利用,安装方法可参考 https://shidawuhen.github.io/2020/02/08/go-callvis/ 。
左上角方框内数据:表示显示的为cpu的画像。显示的节点在统共30.36s的抽样中,占30.06s,比例为99.01%。
图中每个方框对应运用程序运行的一个函数,方框越大代表函数实行的韶光越久(函数实行韶光会包含它调用的子函数的实行韶光,但并不是正比的关系);方框之间的箭头代表着调用关系,箭头上的数字代表被调用函数的实行韶光。详细细节可以参考:https://github.com/google/pprof/tree/master/doc#interpreting-the-callgraph
方框中显示的韶光为总韶光,findrunnable的总实行韶光为11.24s,总韶光占比为37.02%,只算函数自身实行韶光为0.11s,总韶光占比为0.36%=(0.11/11.24)37.02%。调用函数5.49+4.52+0.23+0.82=11.06约即是11.24-0.11=11.13。
通过函数调用图,可以很直不雅观地看出哪个函数耗时严重。
剖析函数代码当确定出哪个函数耗时之后,可以用pprof剖析函数中的哪一行导致的耗时,利用子命令:list 函数名。
(pprof) list CountRejectTotal: 30.36sROUTINE ======================== asap/controller/limit.CountReject in /Users/bytedance/My/work/code/go/asap/controller/limit/countReject.go 0 3.10s (flat, cum) 10.21% of Total . . 16:// @Router /limit/countreject [get] . . 17:func CountReject(c gin.Context) { . . 18:currentTime := time.Now().Unix() . . 19:key := fmt.Sprintf("count:%d", currentTime) . . 20:limitCount := 5 . 250ms 21:fmt.Println(key) . 2.84s 22:trafficCount, _ := aredis.GetRedis(aredis.BASEREDIS).Incr(key) . . 23:if trafficCount == 1 { . . 24:aredis.GetRedis(aredis.BASEREDIS).Expire(key, 86400) . . 25:} . . 26:if int(trafficCount) > limitCount { . 10ms 27:c.String(http.StatusBadGateway, "reject") . . 28:return . . 29:} . . 30:c.String(http.StatusOK, "ok") . . 31:}
可以看出,对付CountReject函数,耗时的位置紧张在第22行,要求Redis的操作。
Memory Profilingmemory profiling紧张查见地式当前活动工具内存分配。利用方法和CPU Profiling一样,
实行go tool pprof http://localhost:8082/debug/pprof/heap
列出最耗内存的地方仍旧利用top命令,可以看出最耗内存的位置是:http://golang.org/x/net/webdav.(memFile).Write
(pprof) top 20Showing nodes accounting for 16250.09kB, 100% of 16250.09kB total flat flat% sum% cum cum%14704.35kB 90.49% 90.49% 14704.35kB 90.49% golang.org/x/net/webdav.(memFile).Write 1024.38kB 6.30% 96.79% 1024.38kB 6.30% runtime.malg 521.37kB 3.21% 100% 521.37kB 3.21% golang.org/x/net/webdav/internal/xml.init 0 0% 100% 2154.28kB 13.26% github.com/swaggo/gin-swagger/swaggerFiles.init.12 0 0% 100% 1574.07kB 9.69% github.com/swaggo/gin-swagger/swaggerFiles.init.5 0 0% 100% 10976kB 67.54% github.com/swaggo/gin-swagger/swaggerFiles.init.6 0 0% 100% 15225.72kB 93.70% runtime.doInit 0 0% 100% 15225.72kB 93.70% runtime.main 0 0% 100% 1024.38kB 6.30% runtime.mstart 0 0% 100% 1024.38kB 6.30% runtime.newproc.func1 0 0% 100% 1024.38kB 6.30% runtime.newproc1 0 0% 100% 1024.38kB 6.30% runtime.systemstack
每一列的含义和CPU Profiling中表达的同等,只不过这里显示的是内存。
天生函数调用图利用web命名,能够天生函数调用图,只不过显示的内容为内存维度
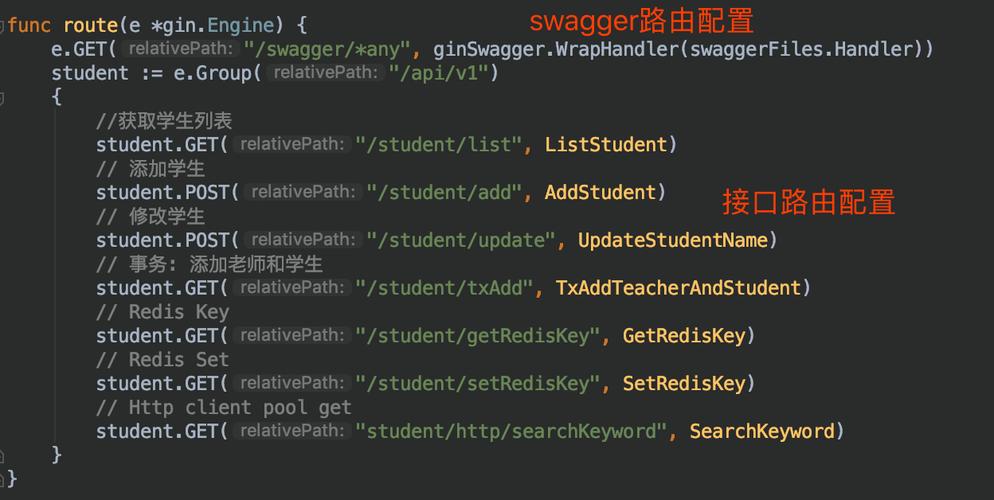
在这个代码里,我利用了swagger,在所有环境里都是打开的,以是看一下这个花费可以创造生产环境确实是没必要开,摧残浪费蹂躏空间。
剖析函数代码仍旧利用list 函数名,如list runtime.malg
(pprof) list runtime.malgTotal: 15.87MBROUTINE ======================== runtime.malg in /usr/local/go/src/runtime/proc.go 1MB 1MB (flat, cum) 6.30% of Total . . 3227:execLock.unlock() . . 3228:} . . 3229: . . 3230:// Allocate a new g, with a stack big enough for stacksize bytes. . . 3231:func malg(stacksize int32) g { 1MB 1MB 3232:newg := new(g) . . 3233:if stacksize >= 0 { . . 3234:stacksize = round2(_StackSystem + stacksize) . . 3235:systemstack(func() { . . 3236:newg.stack = stackalloc(uint32(stacksize)) . . 3237:})
可以看到内存紧张花费的位置。
数据剖析总结利用profile可以获取很多主要信息,cpu profiling、memory profiling利用也是最频繁的。剖析的时候,须要先获取到数据,通过web创造耗时的函数,然后通过list找到详细位置。
其它的数据的剖析和CPU、Memory基本同等。下面列一下所有的数据类型:
http://localhost:8082/debug/pprof/ :获取概况信息go tool pprof http://localhost:8082/debug/pprof/allocs : 剖析内存分配go tool pprof http://localhost:8082/debug/pprof/block : 剖析堆栈跟踪导致壅塞的同步原语go tool pprof http://localhost:8082/debug/pprof/cmdline : 剖析命令行调用的程序,web下调用报错go tool pprof http://localhost:8082/debug/pprof/goroutine : 剖析当前 goroutine 的堆栈信息go tool pprof http://localhost:8082/debug/pprof/heap : 剖析当前活动工具内存分配go tool pprof http://localhost:8082/debug/pprof/mutex : 剖析堆栈跟踪竞争状态互斥锁的持有者go tool pprof http://localhost:8082/debug/pprof/profile : 剖析一定持续韶光内CPU的利用情形go tool pprof http://localhost:8082/debug/pprof/threadcreate : 剖析堆栈跟踪系统新线程的创建10.go tool pprof http://localhost:8082/debug/pprof/trace : 剖析追踪当出路序的实行状况
中间件现在盛行的Web框架中的中间件(middleware)技能事理进行剖析,并先容如何利用中间件技能将业务和非业务代码功能进行解耦。
代码泥潭先来看一段代码:
// middleware/hello.gopackage mainfunc hello(wr http.ResponseWriter, r http.Request) { wr.Write([]byte("hello"))}func main() { http.HandleFunc("/", hello) err := http.ListenAndServe(":8080", nil) ...}
这是一个范例的Web做事,挂载了一个大略的路由。我们的线上做事一样平常也是从这样大略的做事开始逐渐拓展开去的。
现在溘然来了一个新的需求,我们想要统计之前写的hello做事的处理耗时,需求很大略,我们对上面的程序进行少量修正:
// middleware/hello_with_time_elapse.govar logger = log.New(os.Stdout, "", 0)func hello(wr http.ResponseWriter, r http.Request) { timeStart := time.Now() wr.Write([]byte("hello")) timeElapsed := time.Since(timeStart) logger.Println(timeElapsed)}
这样便可以在每次吸收到http要求时,打印出当前要求所花费的韶光。
完成了这个需求之后,我们连续进行业务开拓,供应的API逐渐增加,现在我们的路由看起来是这个样子:
// middleware/hello_with_more_routes.go// 省略了一些相同的代码package mainfunc helloHandler(wr http.ResponseWriter, r http.Request) { // ...}func showInfoHandler(wr http.ResponseWriter, r http.Request) { // ...}func showEmailHandler(wr http.ResponseWriter, r http.Request) { // ...}func showFriendsHandler(wr http.ResponseWriter, r http.Request) { timeStart := time.Now() wr.Write([]byte("your friends is tom and alex")) timeElapsed := time.Since(timeStart) logger.Println(timeElapsed)}func main() { http.HandleFunc("/", helloHandler) http.HandleFunc("/info/show", showInfoHandler) http.HandleFunc("/email/show", showEmailHandler) http.HandleFunc("/friends/show", showFriendsHandler) // ...}
每一个handler里都有之条件到的记录运行韶光的代码,每次增加新的路由我们也同样须要把这些看起来长得差不多的代码拷贝到我们须要的地方去。由于代码不太多,以是履行起来也没有碰着什么大问题。
逐渐地我们的系统增加到了30个路由和handler函数,每次增加新的handler,我们的第一件事情便是把之前写的所有和业务逻辑无关的周边代码先拷贝过来。
接下来系统安稳地运行了一段韶光,溘然有一天,老板找到你,我们最近找人新开拓了监控系统,为了系统运行可以更加可控,须要把每个接口运行的耗时数据主动上报到我们的监控系统里。给监控系统起个名字吧,叫metrics。现在你须要修正代码并把耗时通过HTTP Post的办法发给metrics系统了。我们来修正一下helloHandler():
func helloHandler(wr http.ResponseWriter, r http.Request) { timeStart := time.Now() wr.Write([]byte("hello")) timeElapsed := time.Since(timeStart) logger.Println(timeElapsed) // 新增耗时上报 metrics.Upload("timeHandler", timeElapsed)}
修正到这里,本能地创造我们的开拓事情开始陷入了泥潭。无论未来对我们的这个Web系统有任何其它的非功能或统计需求,我们的修正一定牵一发而动全身。只要增加一个非常大略的非业务统计,我们就须要去几十个handler里增加这些业务无关的代码。虽然一开始我们彷佛并没有做错,但是显然随着业务的发展,我们的行事办法让我们陷入了代码的泥潭。
利用中间件剥离非业务逻辑我们来剖析一下,一开始在哪里做错了呢?我们只是一步一步地知足需求,把我们须要的逻辑按照流程写下去呀?
我们犯的最大的缺点,是把业务代码和非业务代码揉在了一起。对付大多数的场景来讲,非业务的需求都是在http要求处理前做一些事情,并且在相应完成之后做一些事情。我们有没有办法利用一些重构思路把这些公共的非业务功能代码剥离出去呢?回到刚开头的例子,我们须要给我们的helloHandler()增加超时时间统计,我们可以利用一种叫function adapter的方法来对helloHandler()进行包装:
func hello(wr http.ResponseWriter, r http.Request) { wr.Write([]byte("hello"))}func timeMiddleware(next http.Handler) http.Handler { return http.HandlerFunc(func(wr http.ResponseWriter, r http.Request) { timeStart := time.Now() // next handler next.ServeHTTP(wr, r) timeElapsed := time.Since(timeStart) logger.Println(timeElapsed) })}func main() { http.Handle("/", timeMiddleware(http.HandlerFunc(hello))) err := http.ListenAndServe(":8080", nil) ...}
这样就非常轻松地实现了业务与非业务之间的剥离,邪术就在于这个timeMiddleware。可以从代码中看到,我们的timeMiddleware()也是一个函数,其参数为http.Handler,http.Handler的定义在net/http包中:
type Handler interface { ServeHTTP(ResponseWriter, Request)}
任何方法实现了ServeHTTP,即是一个合法的http.Handler,读到这里你可能会有一些混乱,我们先来梳理一下http库的Handler,HandlerFunc和ServeHTTP的关系:
type Handler interface { ServeHTTP(ResponseWriter, Request)}type HandlerFunc func(ResponseWriter, Request)func (f HandlerFunc) ServeHTTP(w ResponseWriter, r Request) { f(w, r)}
只要你的handler函数署名是:
func (ResponseWriter, Request)
那么这个handler和http.HandlerFunc()就有了同等的函数署名,可以将该handler()函数进行类型转换,转为http.HandlerFunc。而http.HandlerFunc实现了http.Handler这个接口。在http库须要调用你的handler函数来处理http要求时,会调用HandlerFunc()的ServeHTTP()函数,可见一个要求的基本调用链是这样的:
h = getHandler() => h.ServeHTTP(w, r) => h(w, r)
上面提到的把自定义handler转换为http.HandlerFunc()这个过程是必须的,由于我们的handler没有直接实现ServeHTTP这个接口。上面的代码中我们看到的HandleFunc(把稳HandlerFunc和HandleFunc的差异)里也可以看到这个逼迫转换过程:
func HandleFunc(pattern string, handler func(ResponseWriter, Request)) { DefaultServeMux.HandleFunc(pattern, handler)}// 调用func (mux ServeMux) HandleFunc(pattern string, handler func(ResponseWriter, Request)) { mux.Handle(pattern, HandlerFunc(handler))}
知道handler是怎么一回事,我们的中间件通过包装handler,再返回一个新的handler就好理解了。
总结一下,我们的中间件要做的事情便是通过一个或多个函数对handler进行包装,返回一个包括了各个中间件逻辑的函数链。我们把上面的包装再做得繁芜一些:
customizedHandler = logger(timeout(ratelimit(helloHandler)))
这个函数链在实行过程中的高下文可以用来表示。
要求处理过程
再直白一些,这个流程在进行要求处理的时候便是不断地进行函数压栈再出栈,有一些类似于递归的实行流程:
[exec of logger logic] 函数栈: [][exec of timeout logic] 函数栈: [logger][exec of ratelimit logic] 函数栈: [timeout/logger][exec of helloHandler logic] 函数栈: [ratelimit/timeout/logger][exec of ratelimit logic part2] 函数栈: [timeout/logger][exec of timeout logic part2] 函数栈: [logger][exec of logger logic part2] 函数栈: []
功能实现了,但在上面的利用过程中我们也看到了,这种函数套函数的用法不是很都雅,同时也不具备什么可读性。
更优雅的中间件写法上一节中办理了业务功能代码和非业务功能代码的解耦,但也提到了,看起来并不雅观观,如果须要修正这些函数的顺序,或者增删中间件还是有点费劲,本节我们来进行一些“写法”上的优化。
看一个例子:
r = NewRouter()r.Use(logger)r.Use(timeout)r.Use(ratelimit)r.Add("/", helloHandler)
通过多步设置,我们拥有了和上一节差不多的实行函数链。胜在直不雅观易懂,如果我们要增加或者删除中间件,只要大略地增加删除对应的Use()调用就可以了。非常方便。
从框架的角度来讲,怎么实现这样的功能呢?也不繁芜:
type middleware func(http.Handler) http.Handlertype Router struct { middlewareChain [] middleware mux map[string] http.Handler}func NewRouter() Router{ return &Router{}}func (r Router) Use(m middleware) { r.middlewareChain = append(r.middlewareChain, m)}func (r Router) Add(route string, h http.Handler) { var mergedHandler = h for i := len(r.middlewareChain) - 1; i >= 0; i-- { mergedHandler = r.middlewareChain[i](mergedHandler) } r.mux[route] = mergedHandler}
把稳代码中的middleware数组遍历顺序,和用户希望的调用顺序该当是"相反"的。该当不难明得。
哪些事情适宜在中间件中做以较盛行的开源Go措辞框架chi为例:
compress.go => 对http的相应体进行压缩处理heartbeat.go => 设置一个分外的路由,例如/ping,/healthcheck,用来给负载均衡一类的前置做事进行探活logger.go => 打印要求处理处理日志,例如要求处理韶光,要求路由profiler.go => 挂载pprof须要的路由,如`/pprof`、`/pprof/trace`到系统中realip.go => 从要求头中读取X-Forwarded-For和X-Real-IP,将http.Request中的RemoteAddr修正为得到的RealIPrequestid.go => 为本次要求天生单独的requestid,可一起透传,用来天生分布式调用链路,也可用于在日志中串连单次要求的所有逻辑timeout.go => 用context.Timeout设置超时时间,并将其通过http.Request一起透传下去throttler.go => 通过定终年夜小的channel存储token,并通过这些token对接口进行限流