下载地址:https://www.zabbix.com/download
2.php5.4.16.tar.gz

下载地址:https://www.php.net/downloads.php
安装过程路径、密码只管即便不要涌现中文、分外字符、空格、少于8位密码。
把稳不可以跨版本升级
2. 环境准备2.1. 配置 /etc/hostsIP 主机名 用场
10.10.10.181 zabbixserver 监控做事器
2.2. 运用支配路径解释运用名称
路径
Apache配置文件:/etc/httpd/conf/httpd.conf
Apache发布路径:/var/www/html
Zabbix安装路径:/usr/local/zabbix
Zabbix配置文件:/usr/local/zabbix/etc/zabbix_server.conf
Php配置文件:/etc/php.ini
Mysql安装路径:/var/lib/mysql/
2.3. 防火墙开放端口Ø 根据上表端口方案情形,在不同做事器操作开放相应端口
# firewall-cmd --permanent --zone=public --add-port=3306/tcp# firewall-cmd --permanent --zone=public --add-port=80/tcp
Ø 重启防火墙
# firewall-cmd --reload2.4. 关闭SELINUX
# sed -i "s@SELINUX=enforcing@SELINUX=disabled@g" /etc/selinux/config# cat /etc/selinux/config | grep SELINUX=# setenforce 03. Mysql与zabbix干系备份
1、Mysql备份
# /etc/init.d/zabbix_server stop# /etc/init.d/zabbix_agentd stop# mkdir /opt/bak && cd /opt/bak# mysqldump -uroot -p zabbix > /opt/bak/zabbix.sql
2、zabbix配置备份
# cp /usr/local/zabbix/etc/zabbix_server.conf /opt/bak# cp /etc/php.ini /opt/bak# cp /etc/httpd/conf/httpd.conf /opt/bak# cp -R /var/www/html/ /opt/bak/html/4. LAMP环境准备4.1. 依赖包安装
# yum install httpd php php-gd gcc php-mysql php-xml libcurl-devel curl- net-snmp libxml2- bcmath mbstring php-devel lrzsz wget vim zip unzip net-tools ntpdate ntp php-bcmath php-mbstring-y4.2. 创建用户
# useradd zabbix -s /sbin/nologin -M4.3. Mysql安装
参照我的头条文章:CentOS7.x生产环境MySQL社区版yum办法支配
4.4. 建库导入SQL> create database zabbix;SQL> grant all on zabbix. to zabbix@localhost identified by 'zabbixpwd123';SQL> flush privileges;# mysql -uroot -p zabbix < /opt/bak/zabbix.sql4.5. 配置系统内核参数
# vi /etc/sysctl.confkernel.shmmax = 34359738368kernel.shmmni = 4096kernel.shmall = 8388608kernel.sem = 1010 129280 1010 128net.ipv4.ip_local_port_range = 9000 65500net.core.rmem_default = 4194304net.core.rmem_max = 4194304net.core.wmem_default = 262144net.core.wmem_max = 1048576fs.aio-max-nr = 1048576fs.file-max = 6815744# /sbin/sysctl -p4.6. 修正系统资源限定
# vi /etc/security/limits.conf soft nproc 2047 hard nproc 16384 soft nofile 1024 hard nofile 65536 soft stack 102405. Zabbix2.4.8支配5.1. Zabbix安装支配
1、下载路径:
# cd /opt/ && wget https://sourceforge.net/projects/zabbix/files/ZABBIX%20Latest%20Stable/2.4.8/zabbix-2.4.8.tar.gz/download?use_mirror=nchc&download=
2、上传zabbix-2.4.8.tar.gz到做事器/opt目录下面
# tar -zxvf zabbix-2.4.8.tar.gz
3、进行编译安装zabbix_server
# find / -name mysql_config# ./configure --prefix=/usr/local/zabbix --enable-server --enable-agent --with-mysql=/var/lib/mysql/bin/mysql_config --with-net-snmp --with-libcurl --with-libxml2# make && make install# cd /opt/zabbix-2.4.8/misc/init.d/fedora/core# cp zabbix_server /etc/init.d/# cp zabbix_agentd /etc/rc.d/init.d/# chmod +x /etc/rc.d/init.d/zabbix_# vim /etc/rc.d/init.d/zabbix_serverBASEDIR=/usr/local/zabbix# vim /etc/rc.d/init.d/zabbix_agentdBASEDIR=/usr/local/zabbix# chkconfig zabbix_server on# chkconfig --add zabbix_server# chkconfig zabbix_agentd on# chkconfig --add zabbix_agentd# cp /opt/bak/zabbix_server.conf /usr/local/zabbix/etc# cd /opt/ && wget http://www.fping.org/dist/fping-4.2.tar.gz# tar -zxvf fping-4.2.tar.gz && cd fping-4.2/# ./configure && make && make install# which fping/usr/local/sbin/fping# find / -name mysql.sock# mkdir /usr/lib/zabbix/alertscripts -p# chown -R zabbix:zabbix /usr/lib/zabbix# egrep -v "^#|^$" /usr/local/zabbix/etc/zabbix_server.conf
#备注:如果数据库与zabbix_server是异机时参数DBHost的配置要修正为对应数据库IP,并注释DBSocket配置;如果机器是相同时要核对DBSocket的详细路径。
LogFile=/tmp/zabbix_server.logDBHost=localhostDBName=zabbixDBUser=zabbixDBPassword=密码DBSocket=/var/lib/mysql/mysql.sockStartPollers=20AlertScriptsPath=/usr/lib/zabbix/alertscriptsFpingLocation=/usr/local/sbin/fping5.2. Web配置
# cd /var/www/html/# cp -R /opt/zabbix-2.4.8/frontends/php/ .# chown -R apache:apache # cp /opt/bak/php.ini /etc/# vim /etc/httpd/conf/httpd.conf#将如下代码段#ServerName www.example.com:80---修正为ServerName localhost:80#模块中把稳添加php对应版本的支持DirectoryIndex index.html index.phpAddType application/x-httpd-php .php .php3 .php4 .php5# systemctl restart httpd5.3. 登录Zabbix的Web配置界面
1、 在浏览器中打开访问地址:http://10.10.10.181/setup.php
2、检讨系统环境,必须全部ok才能连续
安装时检讨系统环境时的缺点提示:涌现bcmath与mbstring显示为fail
办理方法:安装对应php版本的依赖库
# rpm –qa | grep php-devel# yum -y install php-devel# cd /opt && tar -zxf php-5.4.16.tar.gz# cd php-5.4.16/ext/bcmath/# which phpize/usr/bin/phpize# find / -name php-config/usr/bin/php-config# /usr/bin/phpize# ./configure --with-php-config=/usr/bin/php-config# make && make install# ll /usr/lib64/php/modules/# ll /opt/php-5.4.16/ext/bcmath/modules# cd ../mbstring/# /usr/bin/phpize# ./configure --with-php-config=/usr/bin/php-config# make && make install# systemctl restart httpd
如果还是涌现fail则直接指定库位置,再重启httpd做事
# vim /etc/php.iniextension=/usr/lib64/php/modules/bcmath.soextension=/usr/lib64/php/modules/mbstring.so
3、配置mysql数据连接
Test connection #显示ok表示通过
如下图所示的缺点时,缘故原由是zabbix_server默认会去读取/var/lib/mysql/下的mysql.sock 办理办法是创建该路径,并创建软连接,操作指令如下
# mkdir /var/lib/mysql# ln -s /tmp/mysql.sock /var/lib/mysql/mysql.sock# chown -R mysql:mysql /var/lib/mysql# vi /etc/php.inimysql.default_socket = /var/lib/mysql/mysql.sock# systemctl restart httpd
同时将Database host修正为127.0.0.1
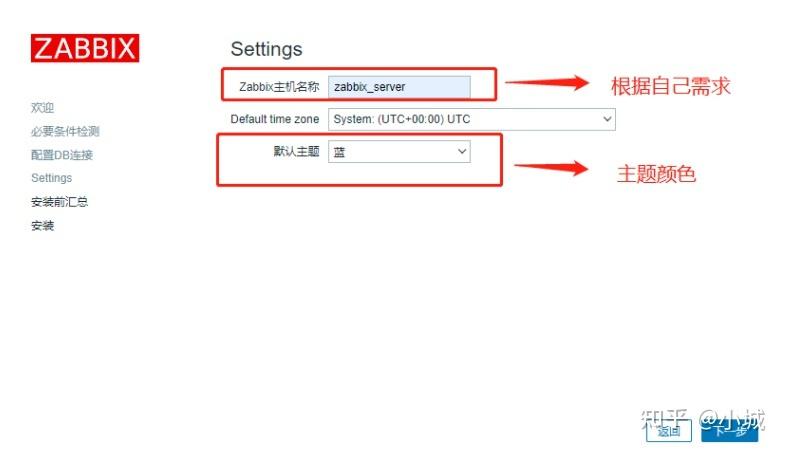
4、5直接点击Next
6点击Finish(如果提示无法创建,须要手工下载提示的zabbix.conf.php ,并将其上传到做事器/var/www/html/conf/路径下)
末了的登任命户/密码:admin/zabbix
5.4. 办理中文显示与乱码问题1、办理中文问题
到server的web界面。点击右上角profile,看是否在措辞项是否有中文,假如有,直接勾选保存,web界面就可以显示中文,假如没有中文选项,那么进行一下配置。
# vim /var/www/html/include/locales.inc.phpzh_CN' => array('name' => _('Chinese (zh_CN)'), 'display' => false),---修正为'zh_CN' => array('name' => _('Chinese (zh_CN)'), 'display' => true),
重启zabbix_server做事:
# service zabbix_server restart# service zabbix_agentd restart
2、中文乱码问题,在图形等界面部分字体存在乱码问题
将本机C:\Windows\Fonts\simkai.ttf上传到做事器/var/www/html/fonts/
# vim /var/www/html/include/defines.inc.phpdefine('ZBX_GRAPH_FONT_NAME', 'DejaVuSans');---修正为define('ZBX_GRAPH_FONT_NAME', 'simkai');重启zabbix_server做事:# service zabbix_server restart6. Zabbix2.4.8升级至3.0.316.1. Zabbix2.4.8干系文件备份
# mkdir /opt/bak24/html -p# service zabbix_agentd stop# service zabbix_server stop# mysqldump -uroot -p zabbix > /opt/bak24/zabbix.sql# cp -r /usr/local/zabbix /opt/bak24# cp /etc/php.ini /opt/bak24# cp /etc/httpd/conf/httpd.conf /opt/bak24# mv /var/www/html/ /opt/bak24/html/# mv /etc/init.d/zabbix_agentd /opt/bak24# mv /etc/init.d/zabbix_server /opt/bak246.2. Zabbix安装支配
1、下载路径:
# cd /opt/# wget https://cdn.zabbix.com/zabbix/sources/stable/3.0/zabbix-3.0.31.tar.gz
2、上传zabbix-3.0.31.tar.gz到做事器/opt目录下面
# tar -zxvf zabbix-3.0.31.tar.gz
3、进行编译安装zabbix_server
# ./configure --prefix=/usr/local/zabbix --enable-server --enable-agent --with-mysql=/var/lib/mysql/bin/mysql_config --with-net-snmp --with-libcurl --with-libxml2# make && make install# cd /opt/zabbix-3.0.31/misc/init.d/fedora/core# cp zabbix_ /etc/init.d/# chmod +x /etc/rc.d/init.d/zabbix_# vim /etc/rc.d/init.d/zabbix_serverBASEDIR=/usr/local/zabbix# vim /etc/rc.d/init.d/zabbix_agentdBASEDIR=/usr/local/zabbix# chkconfig zabbix_server on# chkconfig --add zabbix_server# chkconfig zabbix_agentd on# chkconfig --add zabbix_agentd# cp /usr/local/zabbix/etc/zabbix_server.conf /opt/bak24/zabbix_server3.conf# cp /opt/bak24/zabbix/etc/zabbix_server.conf /usr/local/zabbix/etc# egrep -v "^#|^$" /usr/local/zabbix/etc/zabbix_server.conf
#备注:如果数据库与zabbix_server是异机时参数DBHost的配置要修正为对应数据库IP,并注释DBSocket配置;如果机器是相同时要核对DBSocket的详细路径。
LogFile=/tmp/zabbix_server.logDBHost=localhostDBName=zabbixDBUser=zabbixDBPassword=密码DBSocket=/var/lib/mysql/mysql.sockStartPollers=20AlertScriptsPath=/usr/lib/zabbix/alertscriptsFpingLocation=/usr/local/sbin/fping6.3. Web配置
# cd /var/www/html/# cp -R /opt/zabbix-3.0.31/frontends/php/ .# cp /opt/bak24/httpd.conf /etc/httpd/conf# chown -R apache:apache # cp /opt/bak24/php.ini /etc/# vim /etc/httpd/httpd.conf --核对配置信息#将如下代码段#ServerName www.example.com:80---修正为ServerName localhost:80#模块中把稳添加php对应版本的支持DirectoryIndex index.html index.phpAddType application/x-httpd-php .php .php3 .php4 .php5# systemctl restart httpd6.4. 登录Zabbix的Web配置界面
1、 在浏览器中打开访问地址:http://10.10.10.181/setup.php
2、检讨系统环境,必须全部ok才能连续
安装或升级时检讨系统环境时的缺点提示:ldap 显示Warning
办理方法:安装对应php版本的依赖库
# cd /opt && tar -zxf php-5.4.16.tar.gz# cd php-5.4.16/ext/ldap# /usr/bin/phpize# ./configure --with-php-config=/usr/bin/php-config && make && make install
安装ldap报错一:configure: error: Cannot find ldap.h
办理办法:
# yum -y install openldap openldap-devel
安装ldap报错二:configure: error: Cannot find ldap libraries in /usr/lib
办理办法:
# cp -frp /usr/lib64/libldap /usr/lib/# /usr/bin/phpize# make clean && ./configure --with-php-config=/usr/bin/php-config && make && make install# systemctl restart httpd
如果还是涌现Warning则直接指定库位置,再重启httpd做事
# vim /etc/php.iniextension=/usr/lib64/php/modules/ldap.so
3、配置mysql数据连接
Test connection #显示ok表示通过
升级连接数据库时的缺点提示:Cannot connect to the database.
The frontend does not match Zabbix database. Current database version (mandatory/optional): 2040000/2040000.
Required mandatory version: 3000000. Contact your system administrator.
缘故原由:新的Zabbix所需数据库版本与现数据库版本不一致导致,变动版本号即可
办理办法:
# mysql -uroot -pSQL> use zabbix;SQL> update dbversion set mandatory=3000000;SQL> flush privileges;
4、5直接点击Next
6点击Finish
末了的登任命户/密码:admin/zabbix
界面乱码问题处理:
# service zabbix_server start# tail -100f /var/log/messageszabbix_server: Starting zabbix_server:/usr/local/zabbix/sbin/zabbix_server: error while loading shared libraries: libmysqlclient.so.20: cannot open shared object file: No such file or directory# find / -name 'libmysqlclient'/usr/lib64/mysql/libmysqlclient.so.18/usr/lib64/mysql/libmysqlclient.so.18.0.0/mysql/mysql/lib/libmysqlclient.a/mysql/mysql/lib/libmysqlclient.so/mysql/mysql/lib/libmysqlclient.so.20/mysql/mysql/lib/libmysqlclient.so.20.3.15# ln -s /mysql/mysql/lib/libmysqlclient.so.20 /usr/lib64# tail -100f /tmp/zabbix_server.log ---查看zabbix_server日志,排查升级问题…………………17120:20200610:181128.506 completed 98% of database upgrade17120:20200610:181128.507 completed 99% of database upgrade17120:20200610:181128.507 completed 100% of database upgrade17120:20200610:181128.507 database upgrade fully completed17120:20200610:181128.566 server #0 started [main process]17128:20200610:181128.566 server #1 started [configuration syncer #1]17129:20200610:181128.567 server #2 started [db watchdog #1]17130:20200610:181128.567 server #3 started [poller #1]…………………7. 结束